Tutorial Page
This tutorial will provide a step-by-step guidance on how you can create a series of micro-learning courses from a large PPT that you may have traditionally used during an in-class ILT (Instructor Led Training) session. You will also learn how you can not only create eLearning courses from your PPTs but also how to enhance them by adding new material as well as embedding xAPI packages. Finally, the course will also help you in building assessments in your course to help you do both Pre and Post Assessments of the learners that can help you measure the Learning Outcomes and determine the efficacy of the course you’ve built.
Let us start
Here are the topics this tutorial will cover:
Building a Course Plan
Gather your existing resources
Filling in the gaps in learning resources
Create and edit your Micro-Learning Course
1. Start with building a Course Plan
Let us assume you are trying to convert your New Employee Induction Program into a micro-learning
course
that can easily be served via the platform of choice for your new hires. You may want your new
learners
to be able to take the Induction Course via their Laptops or their Smartphones. Either way having a
clear list of topics you want to cover in their Induction program, the preferred sequence of
covering
those programs, identifying which program can be self-paced and which require an online Zoom or MS
Teams
session is the first step.
If you already have a defined structure for your Induction Program that you have followed in the
pre-eLearning days, then your job is largely done. If not, then here is a suggested list of topics
you
may want to cover.
- Company Overview
- Core Values
- Message from the CEO / MD
- Company Solutions (Products and Services)
- Key Personnel
- Reporting Structure
- Growth Path
- Daily - Weekly - Monthly Reporting
- Key HR Policies
- Leave Policy
- Grievance Redressal
- POSH
- Company Quality Policy
Note: The example above is for a typical New Employee Induction program. A similar approach may be
adopted for other programs too, such as Sales Training, Franchisee On-boarding, Product Training for
Support teams etc.
Now that you have the exhaustive list of topics you want to cover, the next step is to identify the
model of imparting the training for each of the items in the list of topics. Your options are
Completely
Self-Paced eLearning, In-person classroom session, Online LIVE session or Hybrid.
Finally estimate the approximate time you expect the learners to spend while undergoing each of the
course. Your typical Course Plan may end up looking something like this:
| S. No. | Topic | Duration (Minutes) | Delivery Model |
|---|---|---|---|
| 1. | Company Overview | 30 | eLearning |
| 2. | Core Values | 60 | eLearning |
| 3. | Message from the CEO / MD | 15 | Online LIVE (Zoom) |
| 4. | Company Solutions (Products and Services) | 90 | Hybrid |
| 5. | Key Personnel | 15 | eLearning |
| 6. | Reporting Structure | 15 | eLearning |
Now that your Course Plan is ready, it is time to assess your content readiness for conducting your Course. Start by taking a stock and gathering your existing resources.
2. Gather your existing resources
If you have been conducting your course as an ILT (Instructor Led Training) model in the traditional Classroom, then you may already have pre-existing presentations (PPTs) for most of the topics in your course. Occasionally this material may also be in alternate formats such as Word Documents, PDFs and Images. Let us now put together the list of your resources in a table/XL spreadsheet to have a consolidated view of your content readiness. Remember, at times the content may not be comprehensive and may need touch-ups and addition when moving to the eLearning model. In extreme cases where the entire session was traditionally conducted impromptu and in-person you may not have any material at all. Record all of this too. Once done your learning resources table may look something like this:
| S. No. | Topic | Current Resources | Comprehensive? | Content Gap |
|---|---|---|---|---|
| 1. | Company Overview | PPT | Yes | - |
| 2. | Core Values | PPT | Yes | - |
| 3. | Message from the CEO / MD | Video | Yes | - |
| 4. | Company Solutions (Products and Services) | PPT | No | PPT Updates |
| 5. | Key Personnel | PPT | No | PPT Updates |
| 6. | Reporting Structure | Word | Yes | PPT version |
| 7. | Understanding Clients | SCORM pkg. | Yes | - |
| 8. | Objection Handling | xAPI pkg. | Yes | - |
| 9. | Leave Policy | None | No | PPT |
Note that each time your existing content is in a format other than PPT, Video, SCORM or TinCan package, you must identify that as a gap. It is critical to ensure that all base learning content is in either of the above stated formats for you to build a high-quality eLearning.
3. Filling in the gaps in learning resources
Now that you have the laundry list of resources in the structure suggested above, it is easy to sift out
the content gaps. Make a shorter table with only the content gaps. Identify the resource in your team or
your extended organization who can help fill in the gaps. For the pre-existing content in PPT format
that needs touch-up and updates the gaps can be filled in very rapidly. Allocate suitable tasks to the
respective team members with a suggested timeline to get those changes done.
The tricky part will
be the topics where no content exists or content exists in long formats like Word docs, PDF documents or
Images. The approach to building eLearning Courses from scratch and from non PPT format are slightly
different. Let us see how you can address both of these.
A. Pre-existing Learning Content
A good place to start organizing your content is by logically structuring content into Course, Modules and Topics. This will help you deploy the content as microlearning modules and make it easy on the learner by reducing the cognitive load. When you do that, your table will look like this:
| S. No. | Module | Topic | Current Resources | Comprehensive? | Content Gap |
|---|---|---|---|---|---|
| 1. | Introduction to the company | Company Overview | PPT | Yes | - |
| 2. | Core Values | PPT | Yes | - | |
| 3. | Message from the CEO / MD | Video | Yes | - | |
| 4. | The People | Company Solutions (Products and Services) | PPT | No | PPT Updates |
| 5. | Key Personnel | PPT | No | PPT Updates | |
| 6. | Reporting Structure | Word | Yes | PPT version | |
| 7. | Our Clients | Understanding Clients | SCORM pkg. | Yes | - |
| 8. | Objection Handling | xAPI pkg. | Yes | - | |
| 9. | Leave Policy | None | No | PPT |
Organizing the content into a multilevel structure is useful for reusing and repurposing topics for
courses that you will build in the future. In addition, making updates to the content will be a less
expensive process as you can retain the modules/topics that do not need to be updated as they are,
and
focus on updating only the necessary topics.
A good tool you could use while building the course is the much acclaimed learning theory - Bloom’s
taxonomy – which categorizes learning levels based on the learning process. It can be used for
constructing learning objectives based on what is expected of the learner at the end of the course.
It
also helps keep the content and assessment consistent with the learning objectives of the course.
As you organize the content in hand, a few points to keep in mind are:
- Plan the sessions/modules with a mix of activities. Pure instruction can get monotonous, result in a bored learner and render the training ineffective. Mixing instruction with activities helps the learner stay interested and engaged.
- Balance text with meaningful graphics. Unrelated graphics negatively impact the quality of your content and meaningful graphics enhance the learning experience.
- Update the images, data and content wherever necessary. If you are using images of your employees, make sure you have updated pictures of them. Any data displayed should be current and the content should capture recent changes and developments.
- Keep the on-screen text short and precise. Where explanations are important, keep the text displayed in bullets and move the sentences and details to the voice over. Ensure the bulleted text play out as short phrases that cover the main and important ideas.
B. No existing Content
When there is no pre-existing content you will have to plan the design first and then the development. Delivery is the final step however you will have to take a decision on the delivery format prior to the design phase. This is because deciding whether you want the delivery to be instructor led or not, in a live classroom or self-paced will be crucial for your content strategy. All these decisions will have to be taken prior to the design phase and strengthened during the design phase.
Designing thecourse:
To start with understand your audience profile and their learning environment. In the example we discussed, the course was planned for new employees who would be learning remotely. Having this knowledge leads us to understand that employees could be accessing content using different devices, using a blended learning model may be more effective and the sessions should have more activities than a live classroom would typically have.
As you start designing the course, you will have to:
- Decide the Learning objectives for the course. As discussed earlier, you could use Bloom’s taxonomy to define the learning objectives. The learning objectives of the course will determine what you should cover in the topics.
- Logically structure into Course, Modules and Topics. List down the names of the modules and topics; Plan the duration of the session as well as the time it should take to cover the topics in a module.
- Break down the plan such that you clearly state how much time be will spent in ice-breakers, in the main instruction, activities and assessments.
- Decide if you would like to introduce interactivities or gamifications and check if you have or can get the tools for building them.
- Collect information & curate it to build the source content; Ensure that it aligns with the course structure and organize the information as per the plan. Evaluate course structure and when necessary reorganize it to avoid repetition of information as well as to give continuity to topics.
- Start writing the storyboard and decide on the media elements and instructional materials to be used. You will have to keep in mind the device the learners are likely to use so that the media elements and instructional materials are appropriate for the devices and do not compromise on the learning experience.
Development of the course:
Once you have the design ready you will need to start developing the learning content.
- Start building the eLearning content. Once the design is complete and the storyboards are built a series of activities will have to start – you will have to make sure the PPTs with the content (text & graphics) are developed. On a platform like the PlayAblo.AI LMS you will be able to upload content as PPTs. If you’d like to bring in interactivity you could also use a rapid authoring tool to develop the learning content.
-
While developing, some Do’s and Don’ts to remember are:
- Keep each topic to the point; address one or two Learning objectives in a topic.
- Don’t fill up too much text in a single slide. Do use short precise text for on screen text and use detailed explanations for the voice overensure the sequence of the bulleted text are in the same order as in the voice over
- Don’t use Italics or fonts that resemble handwriting as they have a negative impact on readability. Do use fonts such as Arial, Calibri, Sans Serif, Open Sans etc that stand straight as they are easier to read.
- Don’t ignore the text and background colours. Do pay attention to the text and background colours. White text on black background and black text on white background and black text on warm colours such as peach, have been highly rated as they make reading easy.
- Develop the supporting instructional materials. Download or create the necessary audio or videos, PDFs for additional reading, supporting documents, worksheets and job aids.
- Ensuring that every stage of design and development is meticulously planned and executed makes the delivery of the content smooth and the learning effective.
When you complete development of the learning content, you will be ready to give it the final shape as a micro-learning course and deploy it to the LMS.
Need Help?
Since the process of designing, developing, and delivering large amounts of training content requires professionals, some companies do invest in L&D teams. However, if your company does not have an L&D team or e-learning professionals, you can use the content development services offered by PlayAblo.AI. Just drop us a note and we will reach out to you shortly.
Groundwork done; we are now ready to
Create your Micro-Learning Course on
PlayAblo.AI!
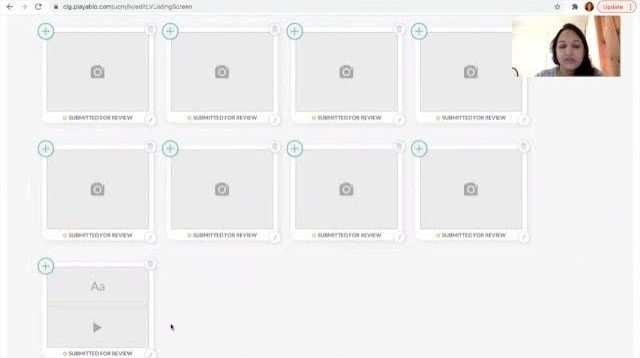
4. Create and edit your Micro-Learning Course
PlayAblo.AI provides you multiple options to ensure that you can create beautiful
micro-learning courses for your learners. While PlayAblo.AI provides
support
for ready-made xAPI and SCORM packages it also helps you create mobile
friendly eLearning courses right from PPTs, video content or just plain
text.
In addition to the above you will occasionally also want to update your
courses to edit existing content to include the changes since the last update. The edit maybe in
terms of addition, updates or deletion. This video tutorial also covers the following:
- Add new slides
- Change content in a slide
- Remove a Slide
- Add a new template page
- Edit an existing template-based page
Note: In case your existing content is a one large PPT with all topics covered then you must break that PPT down into smaller presentations. Each presentation should cover individual topics so they can be setup as a separate micro-learning module that can be tracked and measured.